JINMA AIR CLEANER PROJECT Moving the air cleaner outside of the battery bay BY NORM SOLARI |
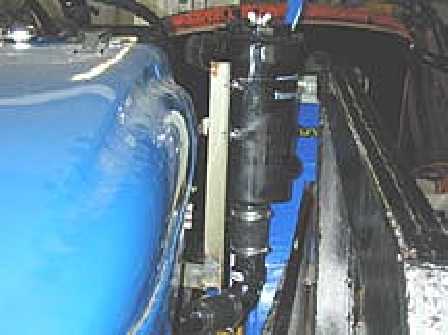
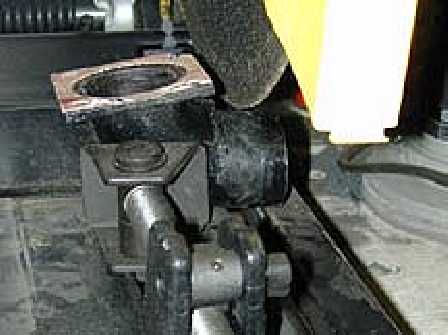
After modifying my 1st generation fiberglass hood to tilt forward, I decided to get the air cleaner out of the battery bay so that I could have even more room up there (Maybe room for a coolant recovery tank?). I looked at the similar modification that Terry Barlow did (TRACTOR-OUTLET). It was well done but I did not want to mount the air cleaner to the FEL. Instead, I wanted a modification that would not interfere with removal of the FEL or that could be done to a tractor without a FEL. Also, since I had modified my hood to tilt forward, I did not like the idea of drilling a hole through the side of the hood for the intake air ducting. I wanted to design the mount and air ducting so that it could be done in any shop with minimum welding. In fact, what I ended up with is a design that could be done without any welding if one desired. The first order of business was to determine where to attach the mount. I decided to use two bolts that were already there. The main bolt is on the left side and holds the hood mount to the fuel tank platform. I cut a piece of 11/4 x 11/4 angle iron 5 inches long. I then marked and drilled a hole for the angle iron to mount on the above mentioned bolt. I then cut another piece 5 inches long and drilled it to mount to the bottom of the strap holding the fuel tank in place. When attached to the first piece, it created a triangle and made for a relatively stable mount. For the upright, I cut a piece of 11/4 x 13/4 angle iron 15 inches long. I oriented it so that the wide side was facing out. That way, I could bolt the air cleaner directly to it. |
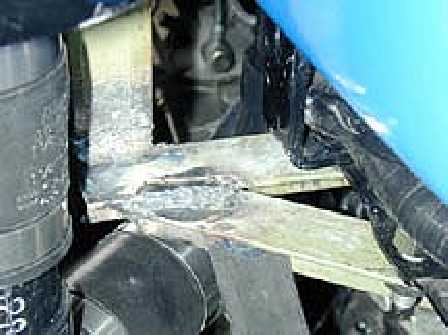
I welded the upright to the first piece of angle iron at a 90 deg angle. I then mounted it to the tractor and lined up the second 5 inch piece to form a triangle with the first piece and the platform under the fuel tank. Once I had it all positioned, I welded the second piece to the structure. (These pieces could also be drilled and bolted together if someone wants to build this project but does not have access to welding equipment.) |
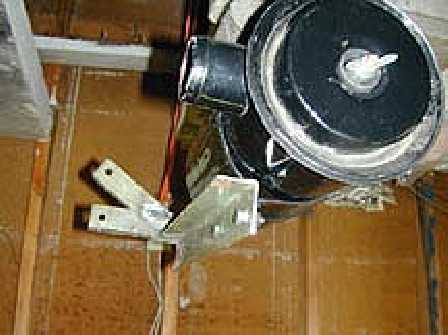
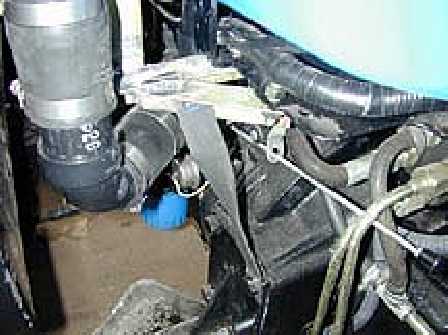
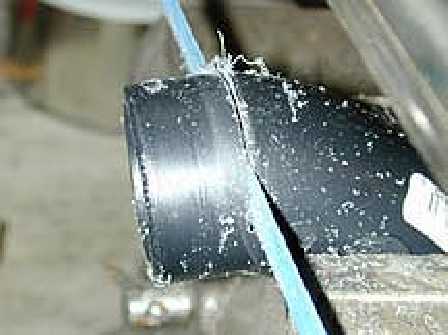
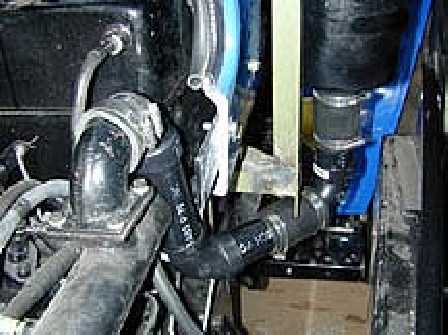
The last step was to fabricate an additional support bracket that runs from the inspection cover bolts on the flywheel housing to the mounting bracket. This stabilizes the whole setup and adds support for the outer edge of the Air cleaner mount. While it is difficult to see in the picture, I chose to bolt the support to the main mount. This makes it easier to remove things when disassembly is necessary. For the air ducting, I used 11/2 inch black plastic (ABS) pipe and the same size rubber couplings. I used these because my goal was to design a ducting system that did not require welding. I went to my nearest home improvement center and purchased a selection of fittings, a 3 foot section of the pipe and some 11/2 inch rubber couplings. Routing is a matter of personal choice so I won't go into exact measurements here. Also, since it is fairly tight under the hood, differences in tractors will dictate routing so I will leave that to the individual. |
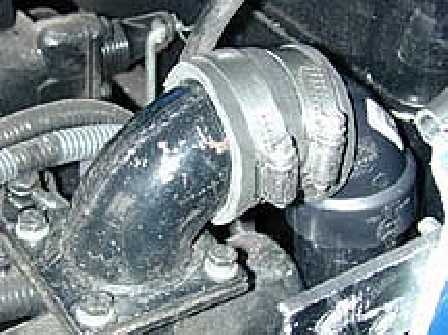
In any case, it will probably be necessary to make a 180 degree pipe from the flange. I cut about 1/2 inch off of the factory intake flange pipe. I also cut about 11/2 inches off of a plastic 90deg "Street Elbow". I then cut a rubber coupling in the middle making a coupling roughly 2 inches long and used it to connect the "Street elbow" and the factory flange. This gave me roughly a 180degree bend and a flexible joint for making slight adjustments to the angle. By mounting the flange backward, I was able to direct the piping down between the back of the intake manifold and the fuel tank. It was then a simple matter to fit other pieces into the system until I had it routed to the bottom of the air cleaner where I connected the plastic pipe to the air cleaner with another rubber coupling. |
One other note about the plastic piping: I did not use white pipe because it has slightly thicker walls. This makes it heavier but, of more importance, it leaves slightly less area inside for air to flow through. Since the original intake is roughly 11/2 inches in diameter, the black plastic seems to be close enough to flow enough air for the engine to breath properly. I have run it about 2 hours and done work including moving dirt. The engine is getting all the air it needs and is running good. It does not blow any black smoke beyond what is normal. As shown in the pictures, I used 3 rubber couplings (The 180deg bend, the bottom of the air cleaner and the connector pipe running just below the mount). This allows for flexible joints which absorb any vibrations. As I said, the piping can be run other than the way I did it. Also, It can be made with metal pipe and welded together. The angle Iron that I used was material that I had "In stock" from old bed rails so it did not cost me anything. The plastic pipe and couplings for the air ducting cost roughly $19 and I had pieces left over that I really didn't need to buy. The actual cost for the materials I used was probably closer to $15. Also, I took the photographs before painting the brackets so that they would be more visible in the pictures. If you have any questions or comments, please email me [ranchsol@hotmail.com] Norm Solari |